E-mail Setup Guides
Step 1
First open your Microsoft outlook program and go to File >Account Settings

Step 2
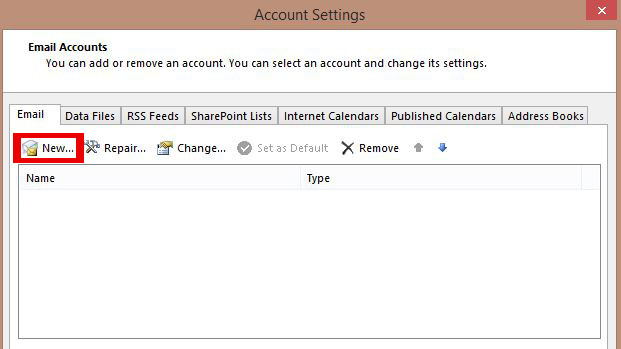
This will open a window with multiple options. Please go to New
Step 3
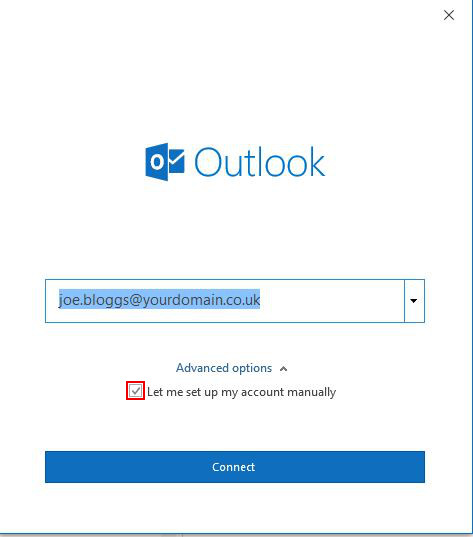
Once opened please enter your email address and select (Let me setup my account manually) then click Connect.
Step 4
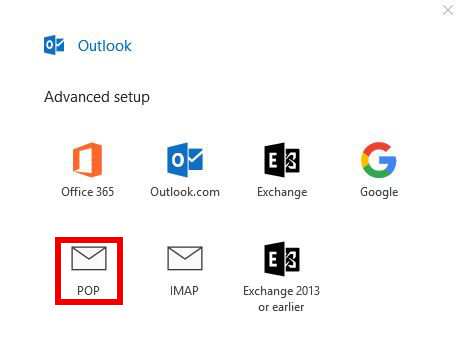
On the next screen please select POP from the options
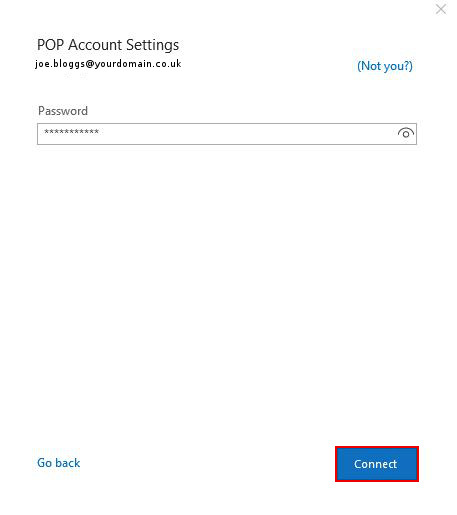
Step 5
This will open a window like below. Please input your email Password provided to you and click Connect.
Setting Up Mac E-mail
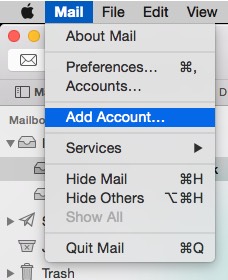
Step 1
Click on Mail > Add Account.
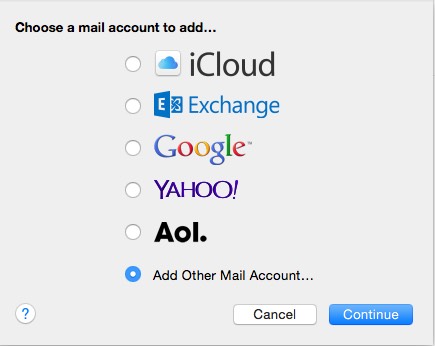
Step 2
Click on Add other Mail account and click continue.
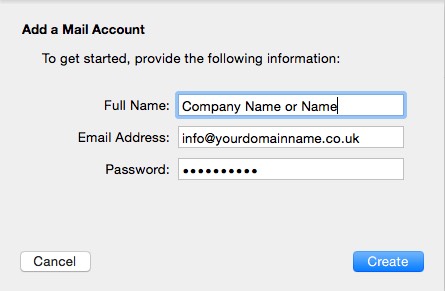
Step 3
Complete mail account details as detailed below.
Step 4
Select pop and then enter your incoming mail server details as shown below, you will have been sent the mail server along with your login details.

Step 5
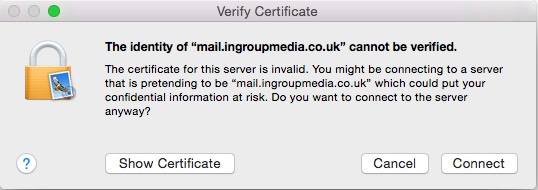
You may be shown the following warning but if so then please press connect.
Step 6
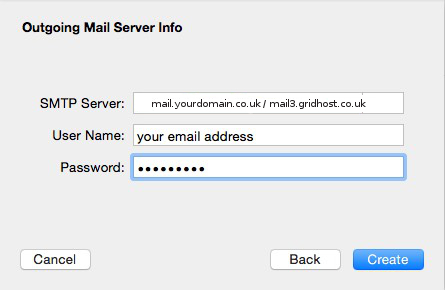
Enter your outgoing mail server details as shown below.
Setting Up Outlook Express
Step 1
Go to www.hotmail.co.uk / live.co.uk and login to your email account
Step 2
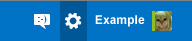
Go to the top right of your webpage and click on the options button
Step 3
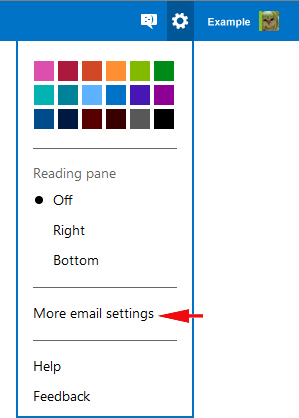
When the list appears click on “More email settings”
Step 4
When the page loads click “Your email accounts”
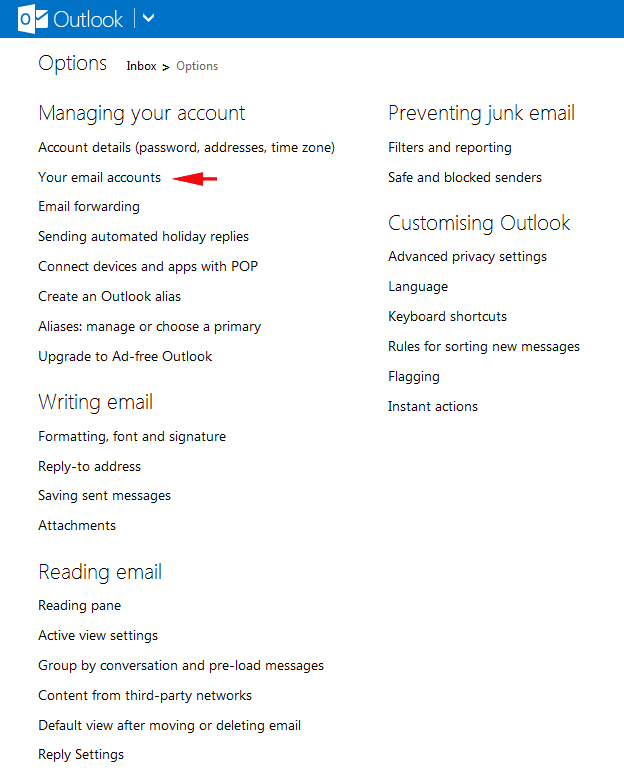
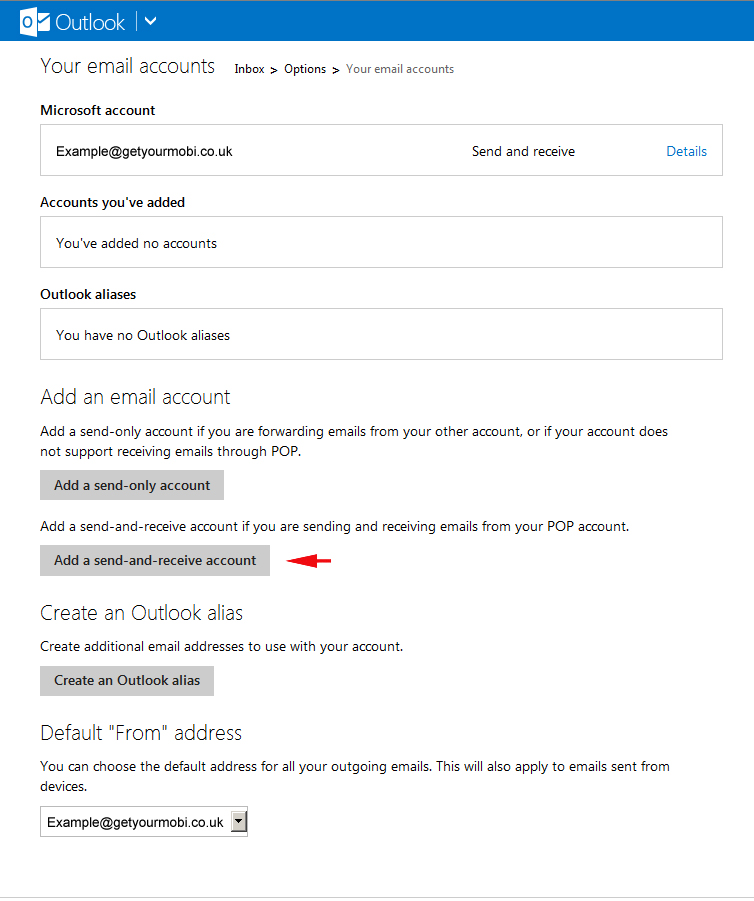
Step 5
On the next page click “Add a send and receive account”
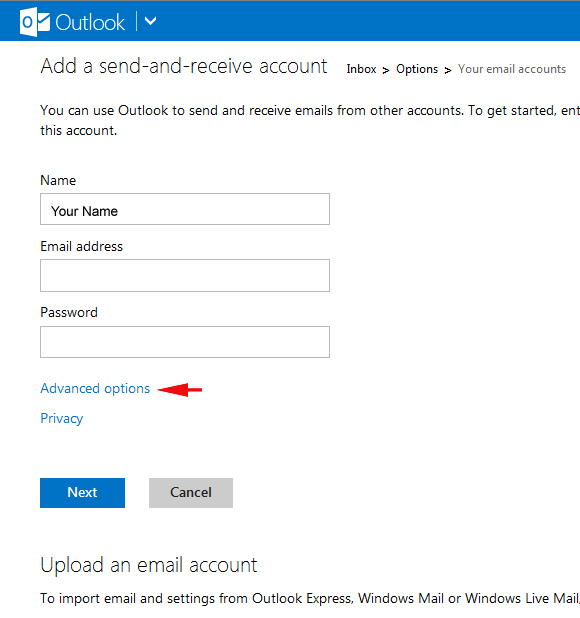
Step 6
Click advanced options to expand the options
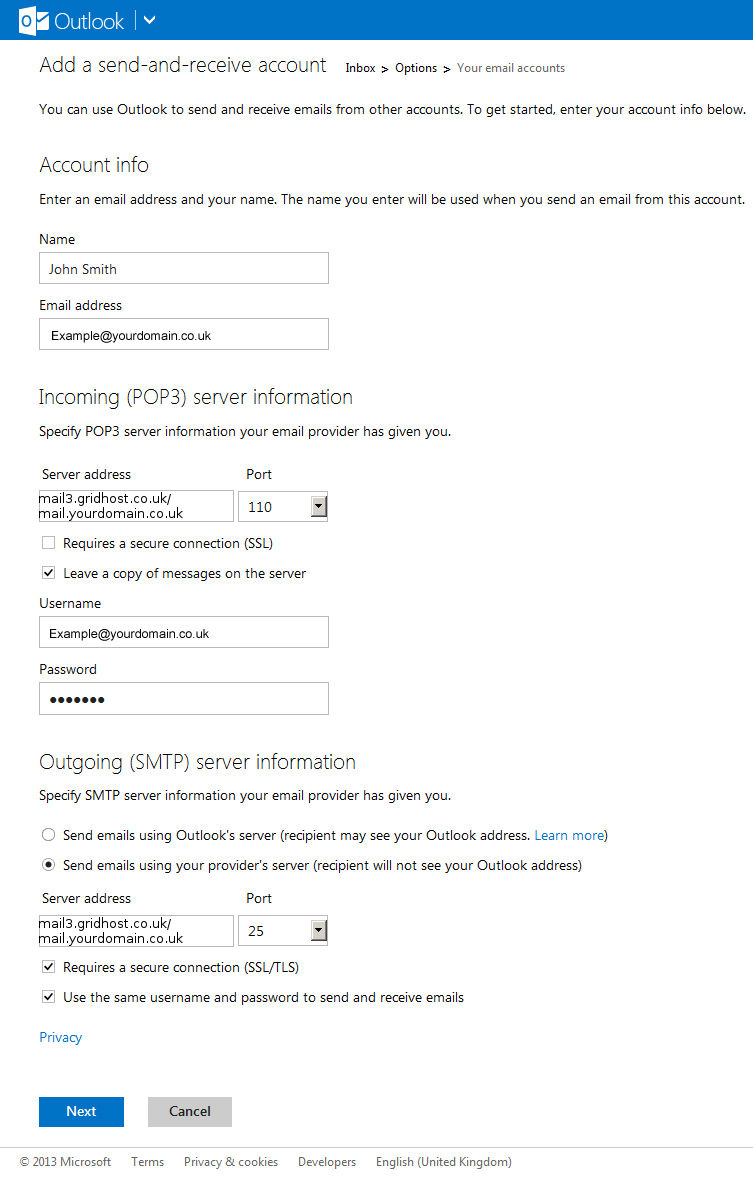
Step 7
Fill in the first box with your name
Put your new email in the second box
replace “yourdomain.co.uk” with what ever is after the @ in your email address.
Enter your server address. (this will be provided with your login details)
Select port 110
Put your new email in the username box
put your new password in the password box
replace “yourdomain.co.uk” with what ever is after the @ in your email address.
Enter your server address. (this will be provided with your login details)
Select port 25
Click Next
Step 8
You can now choose to either create a new folder for your email or to merge it with your normal inbox.

Mail on iPhone or iPad
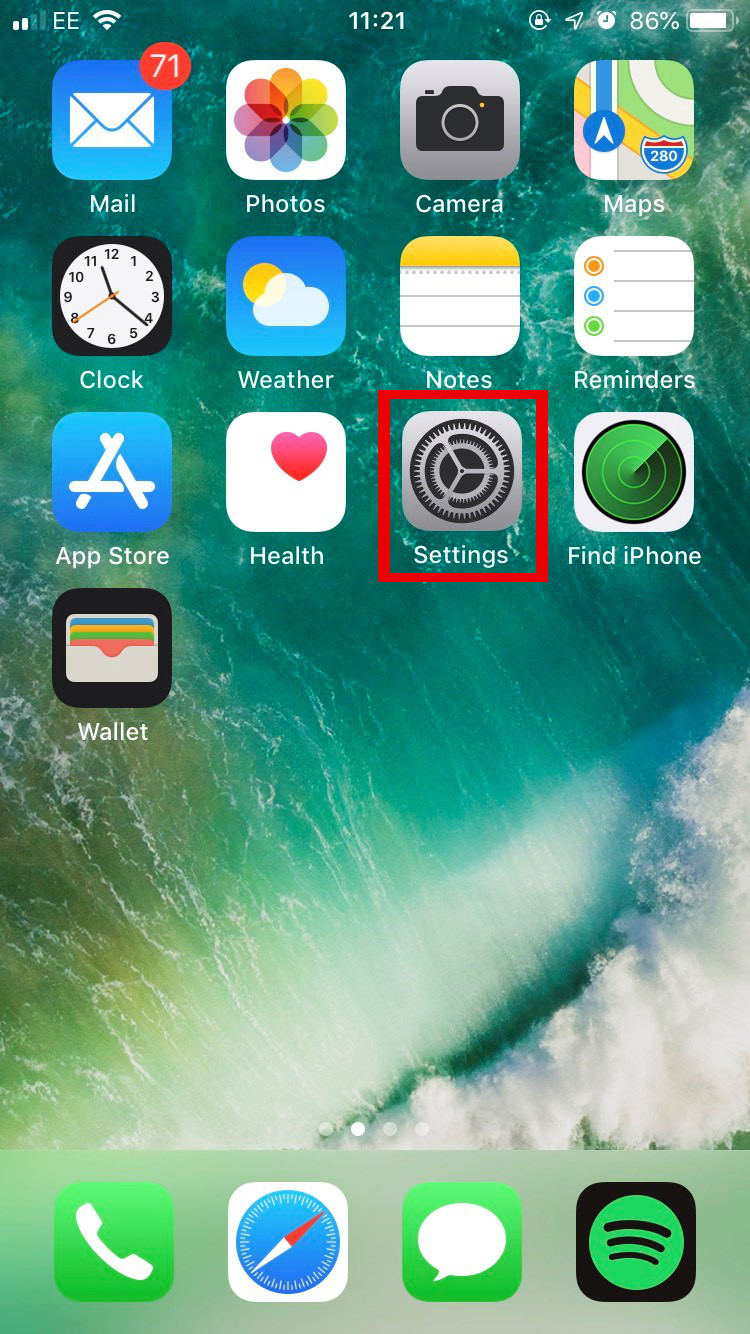
1. Find and click the settings icon on your screen.
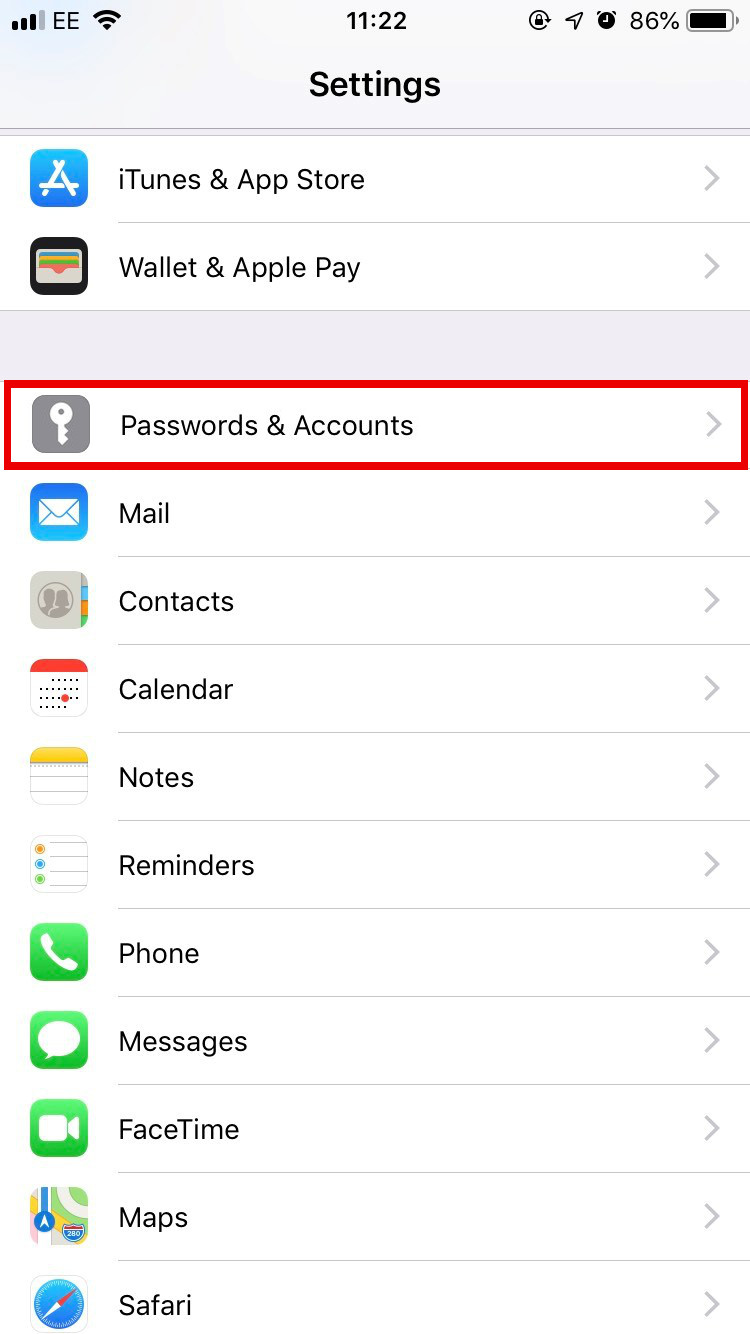
2. Scroll down until you find the Passwords & Accounts tab and click.
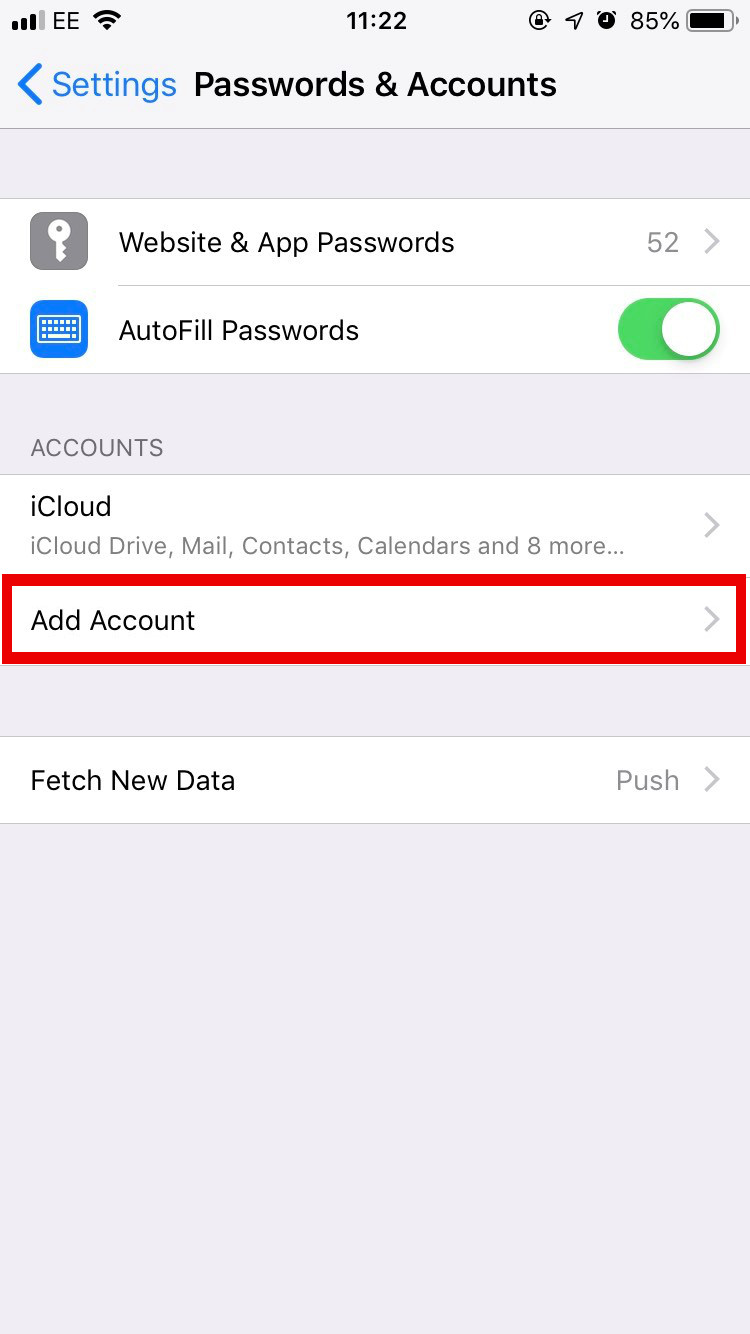
3. Under the Accounts section click Add Account.
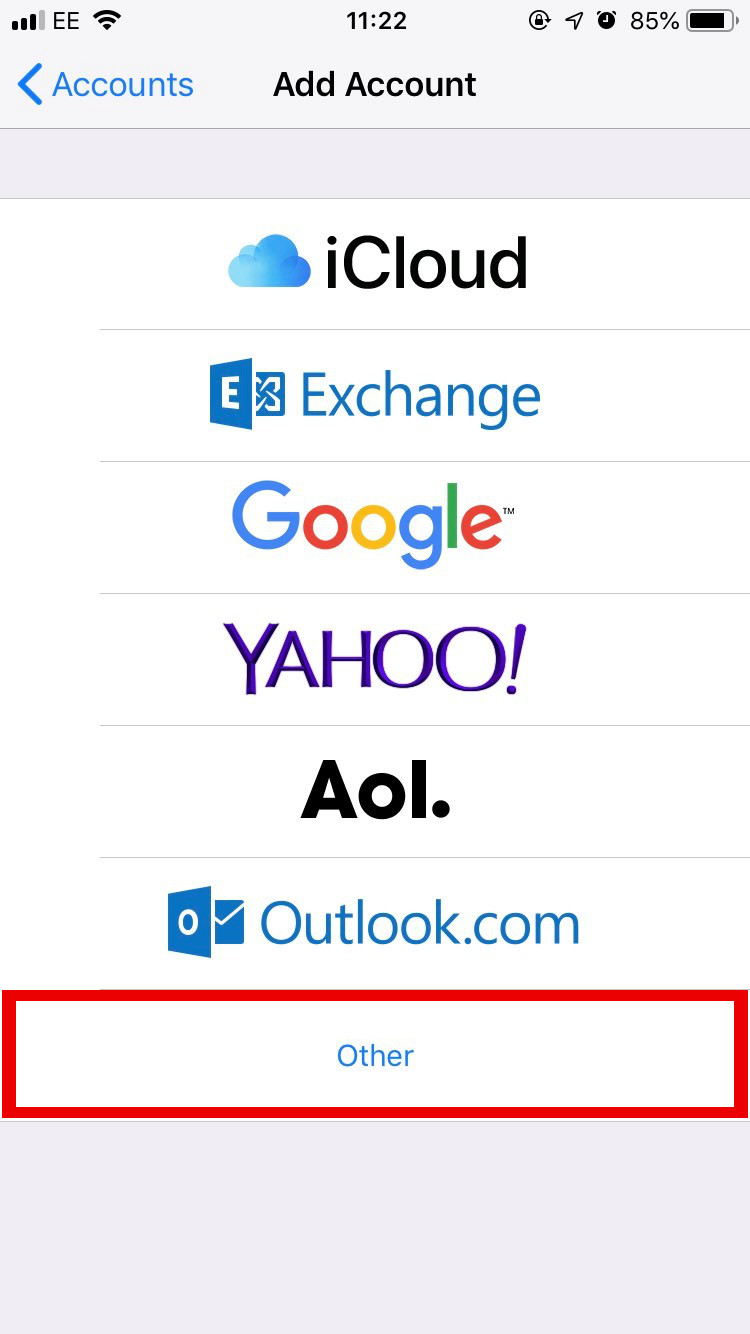
4. You will then be able to choose the account you want to set up, if you scroll to the bottom and select Other.
5. Under the Mail section select Add Mail Account.
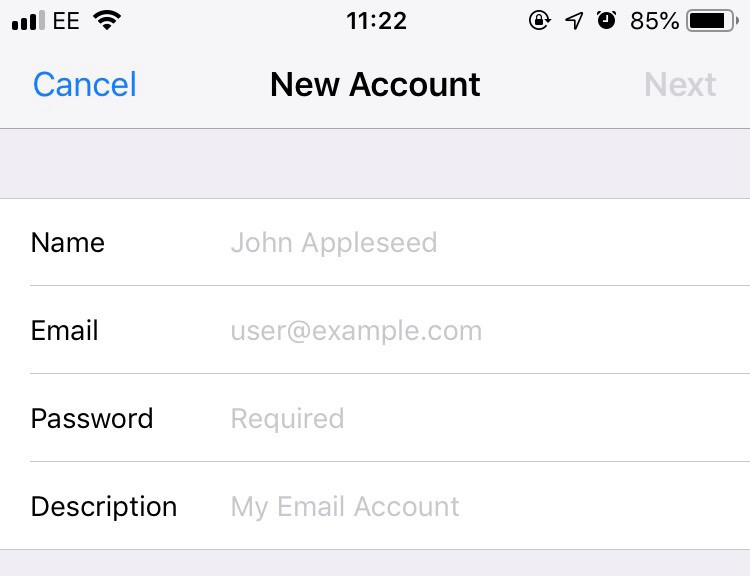
6. In this section you will add you details to your account.
- Name – Your name or Company name.
- Email – Enter your Email Address in here.
- Password – Enter your Password given to you.
- Description – Enter your Email Address again.
Click Next once you have added the correct information.
7. Click POP at the top of the page.
8. Under the Incoming Mail Server fill in the relevant details.
- Host Name – server2.getyourmobi.co.uk or mail.yourdomain.co.uk
- Username – Your Email Address
- Password – Your Email Password
9. Under the Outgoing Mail Server fill in the relevant details.
- Host Name – server2.getyourmobi.co.uk or mail.yourdomain.co.uk
- Username – Your Email Address
- Password – Your Email Password
10. It will say Cannot Verify Server Identity click Continue, It may take a few minutes to Verify.
11. You should be back at your Mail Accounts Sections. Select your account you have just made.
12. If you scroll down and under the Outgoing Mail Server, Select SMTP mail.yourdomainname
13. Make sure that the Primary server is server2.getyourmobi.co.uk or mail.yourdomain.co.uk is On, if not select it and turn it on.
14. make sure the details are correct
- Server – On
- Host Name – server2.getyourmobi.co.uk or mail.yourdomain.co.uk
- User Name – Your Email address
- Password – Your Password
- Use SSL – On
- Authentication – Password
- Server Port – 587
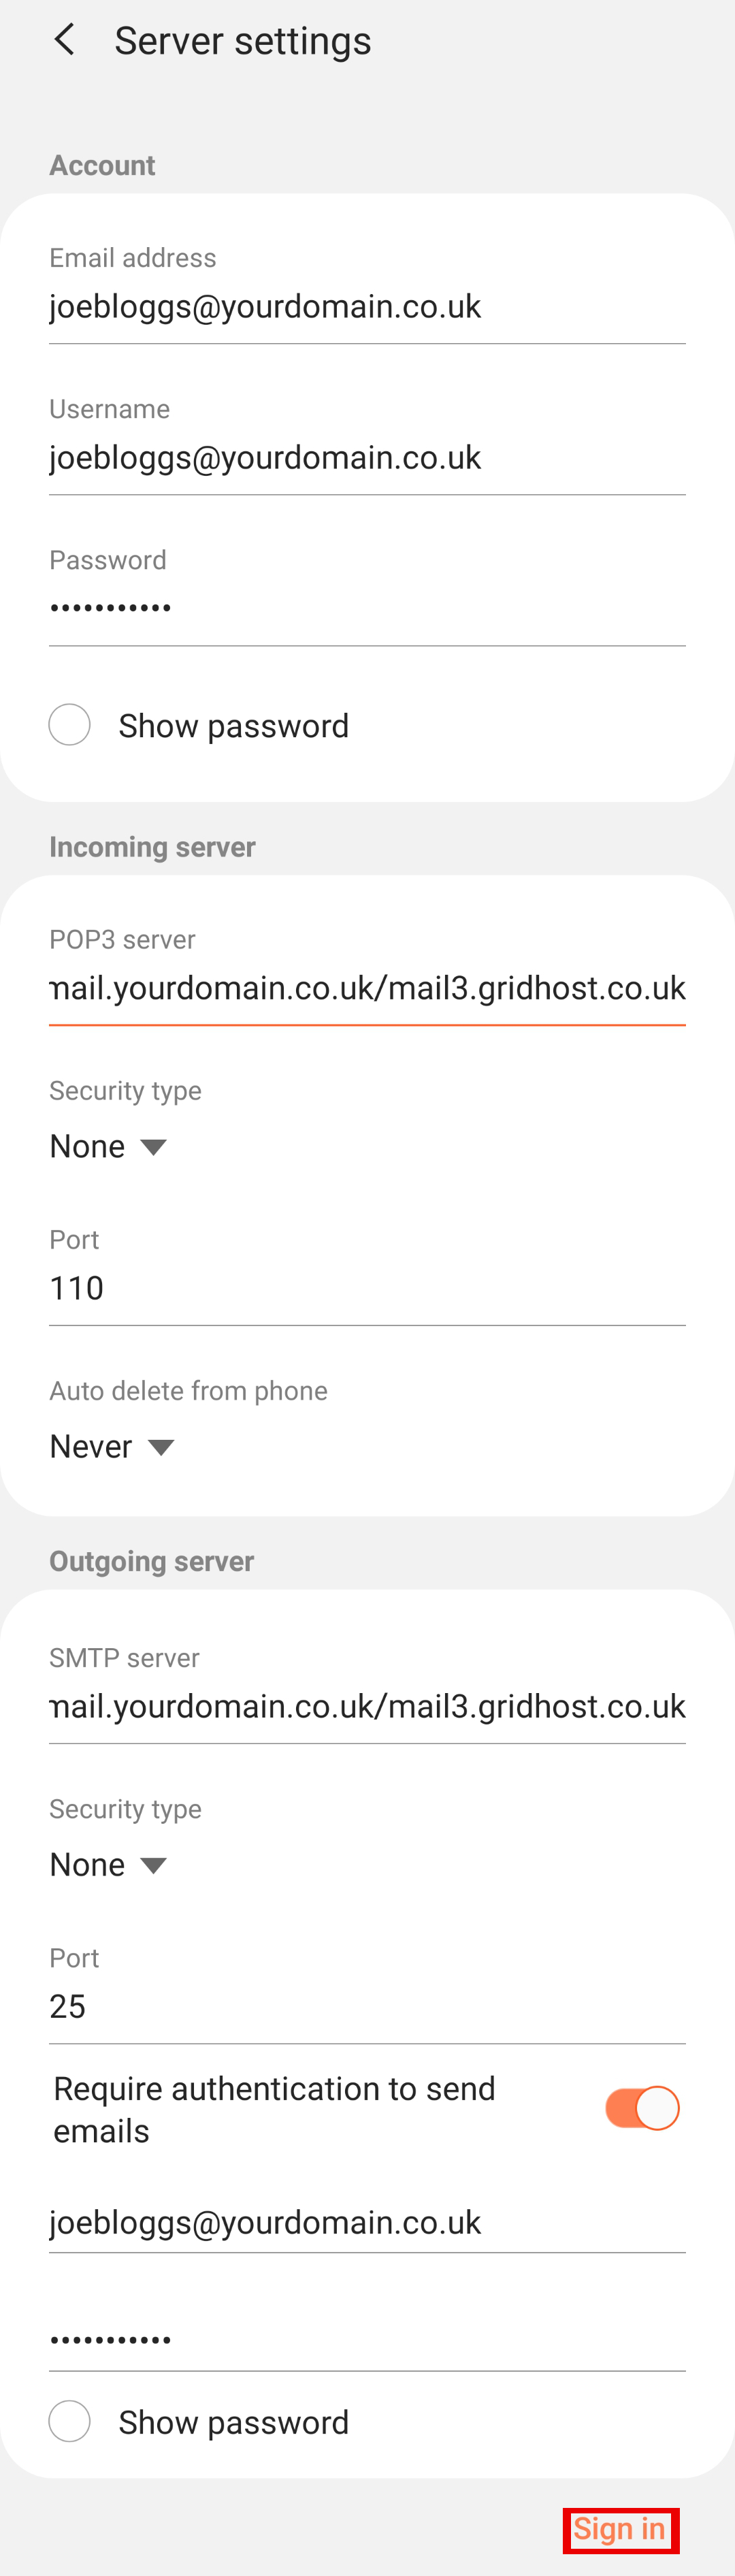
Mail On Android
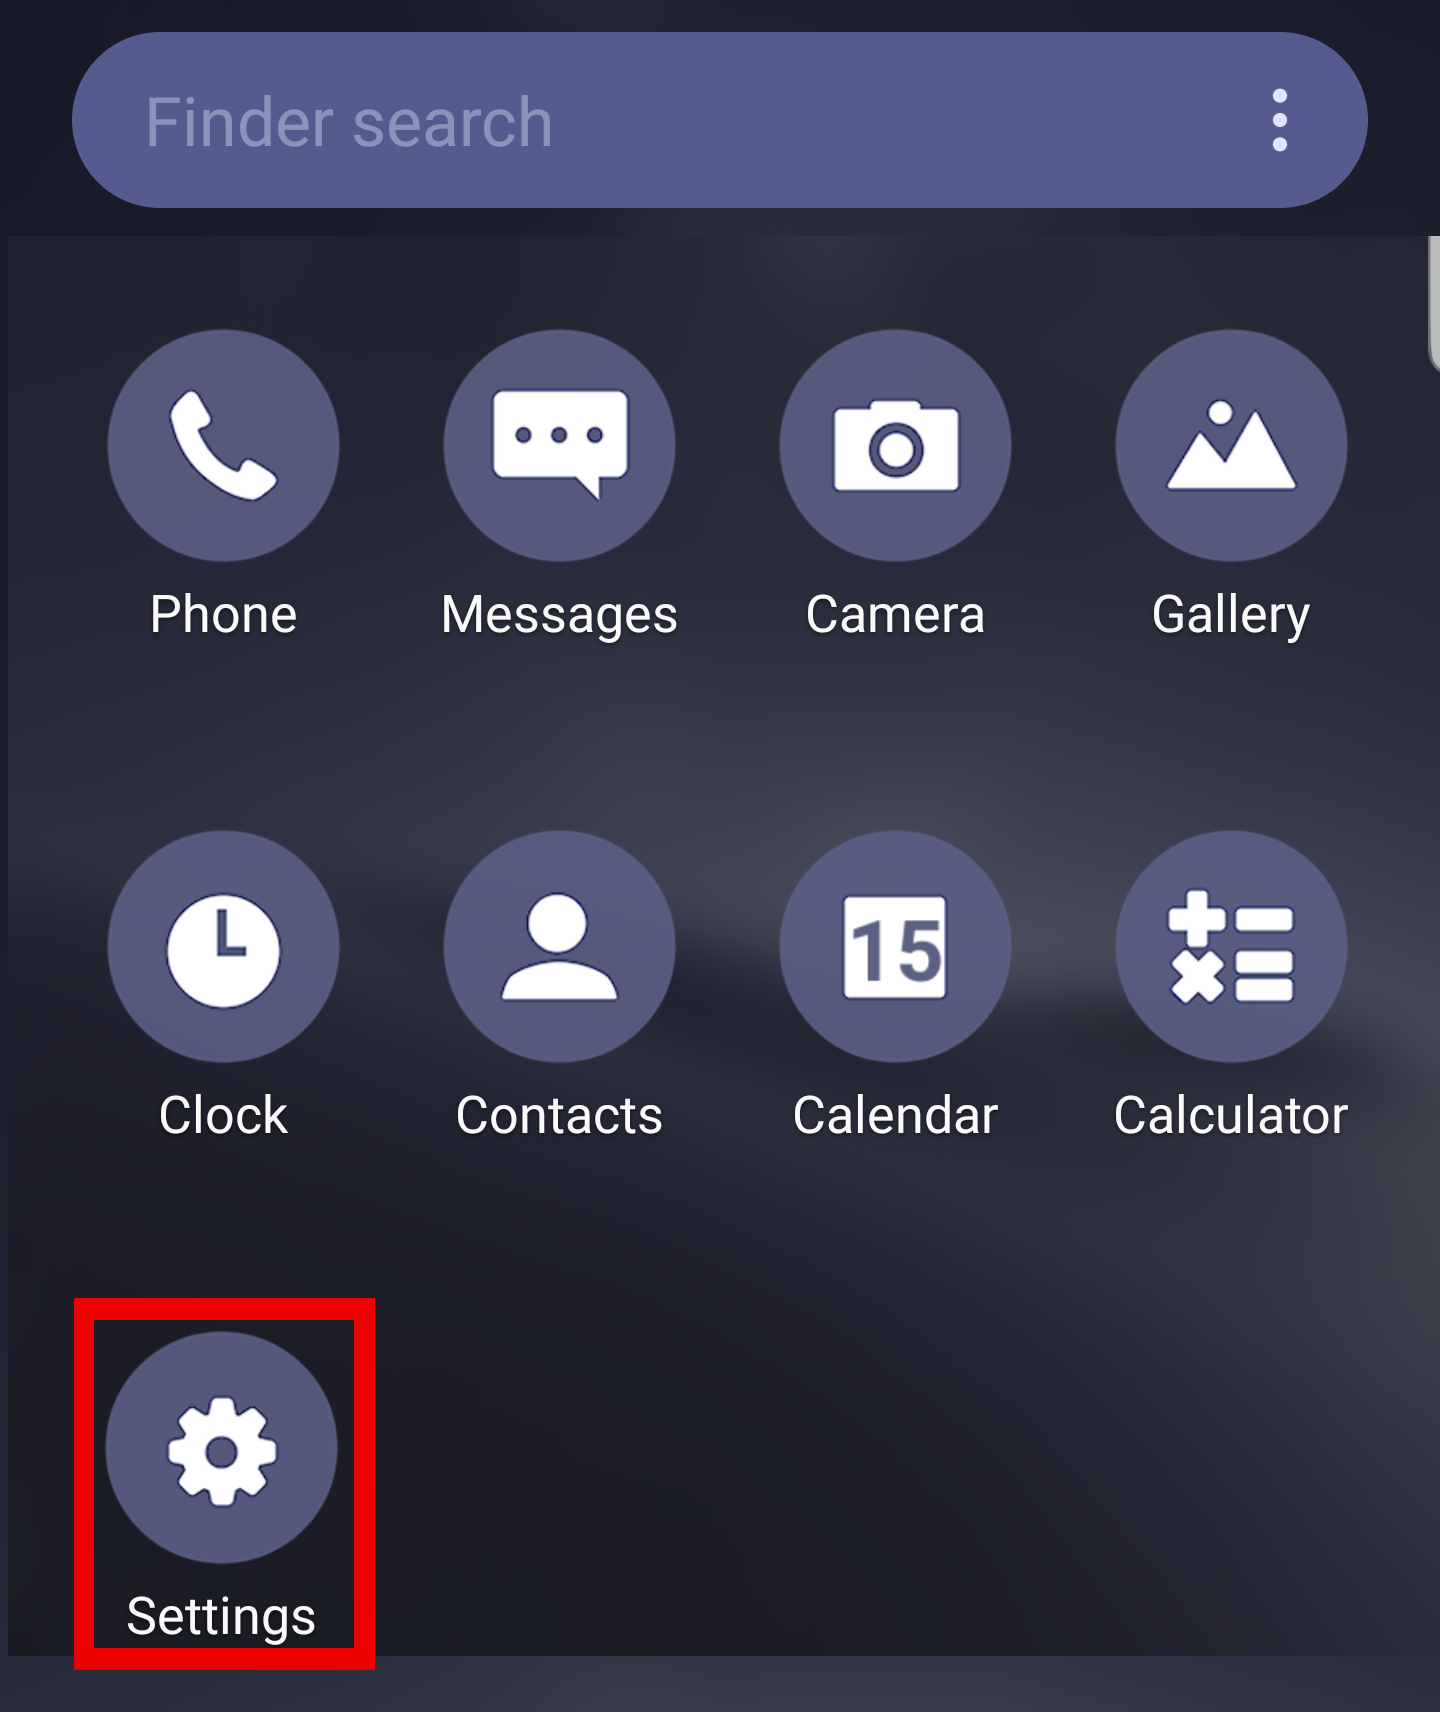
Step 1:
Click on ‘Settings’ icon in the main menu
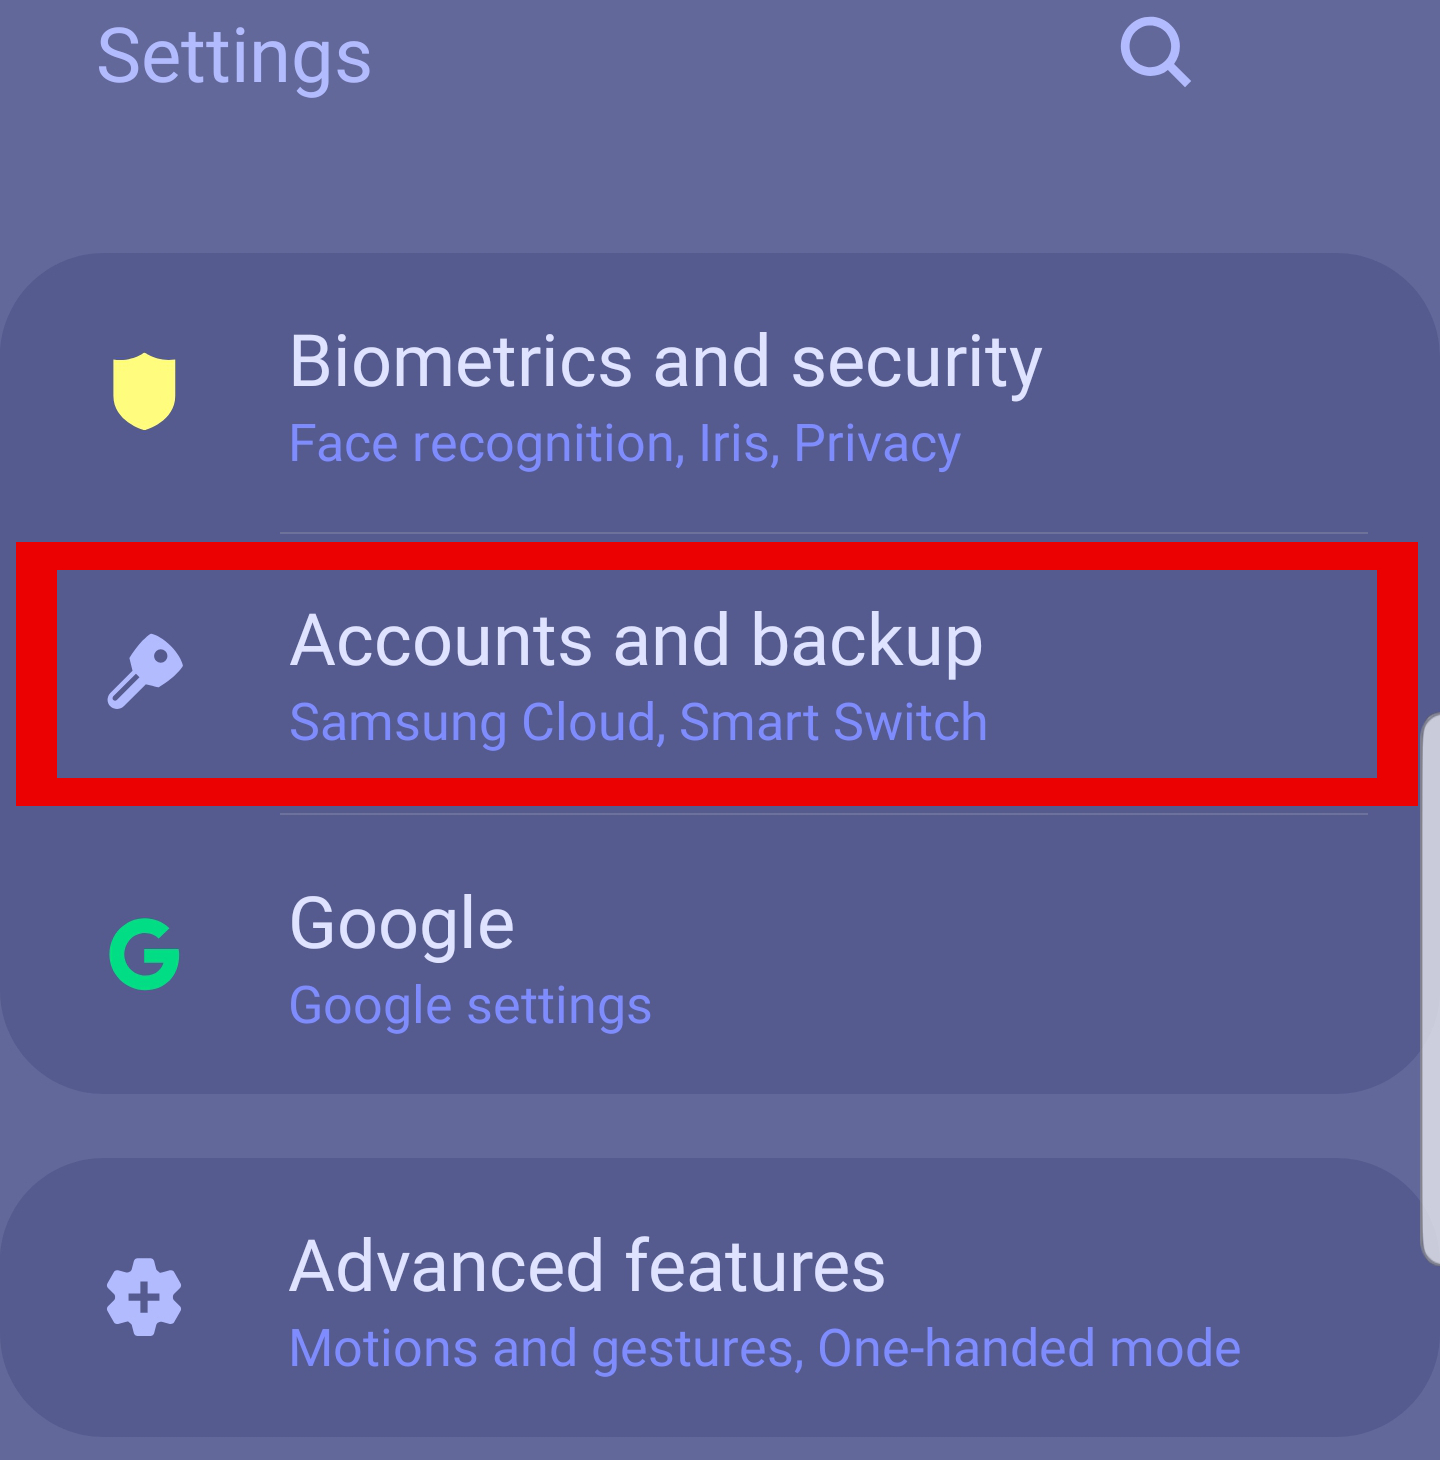
Step 2:
Click on Accounts and Passwords.
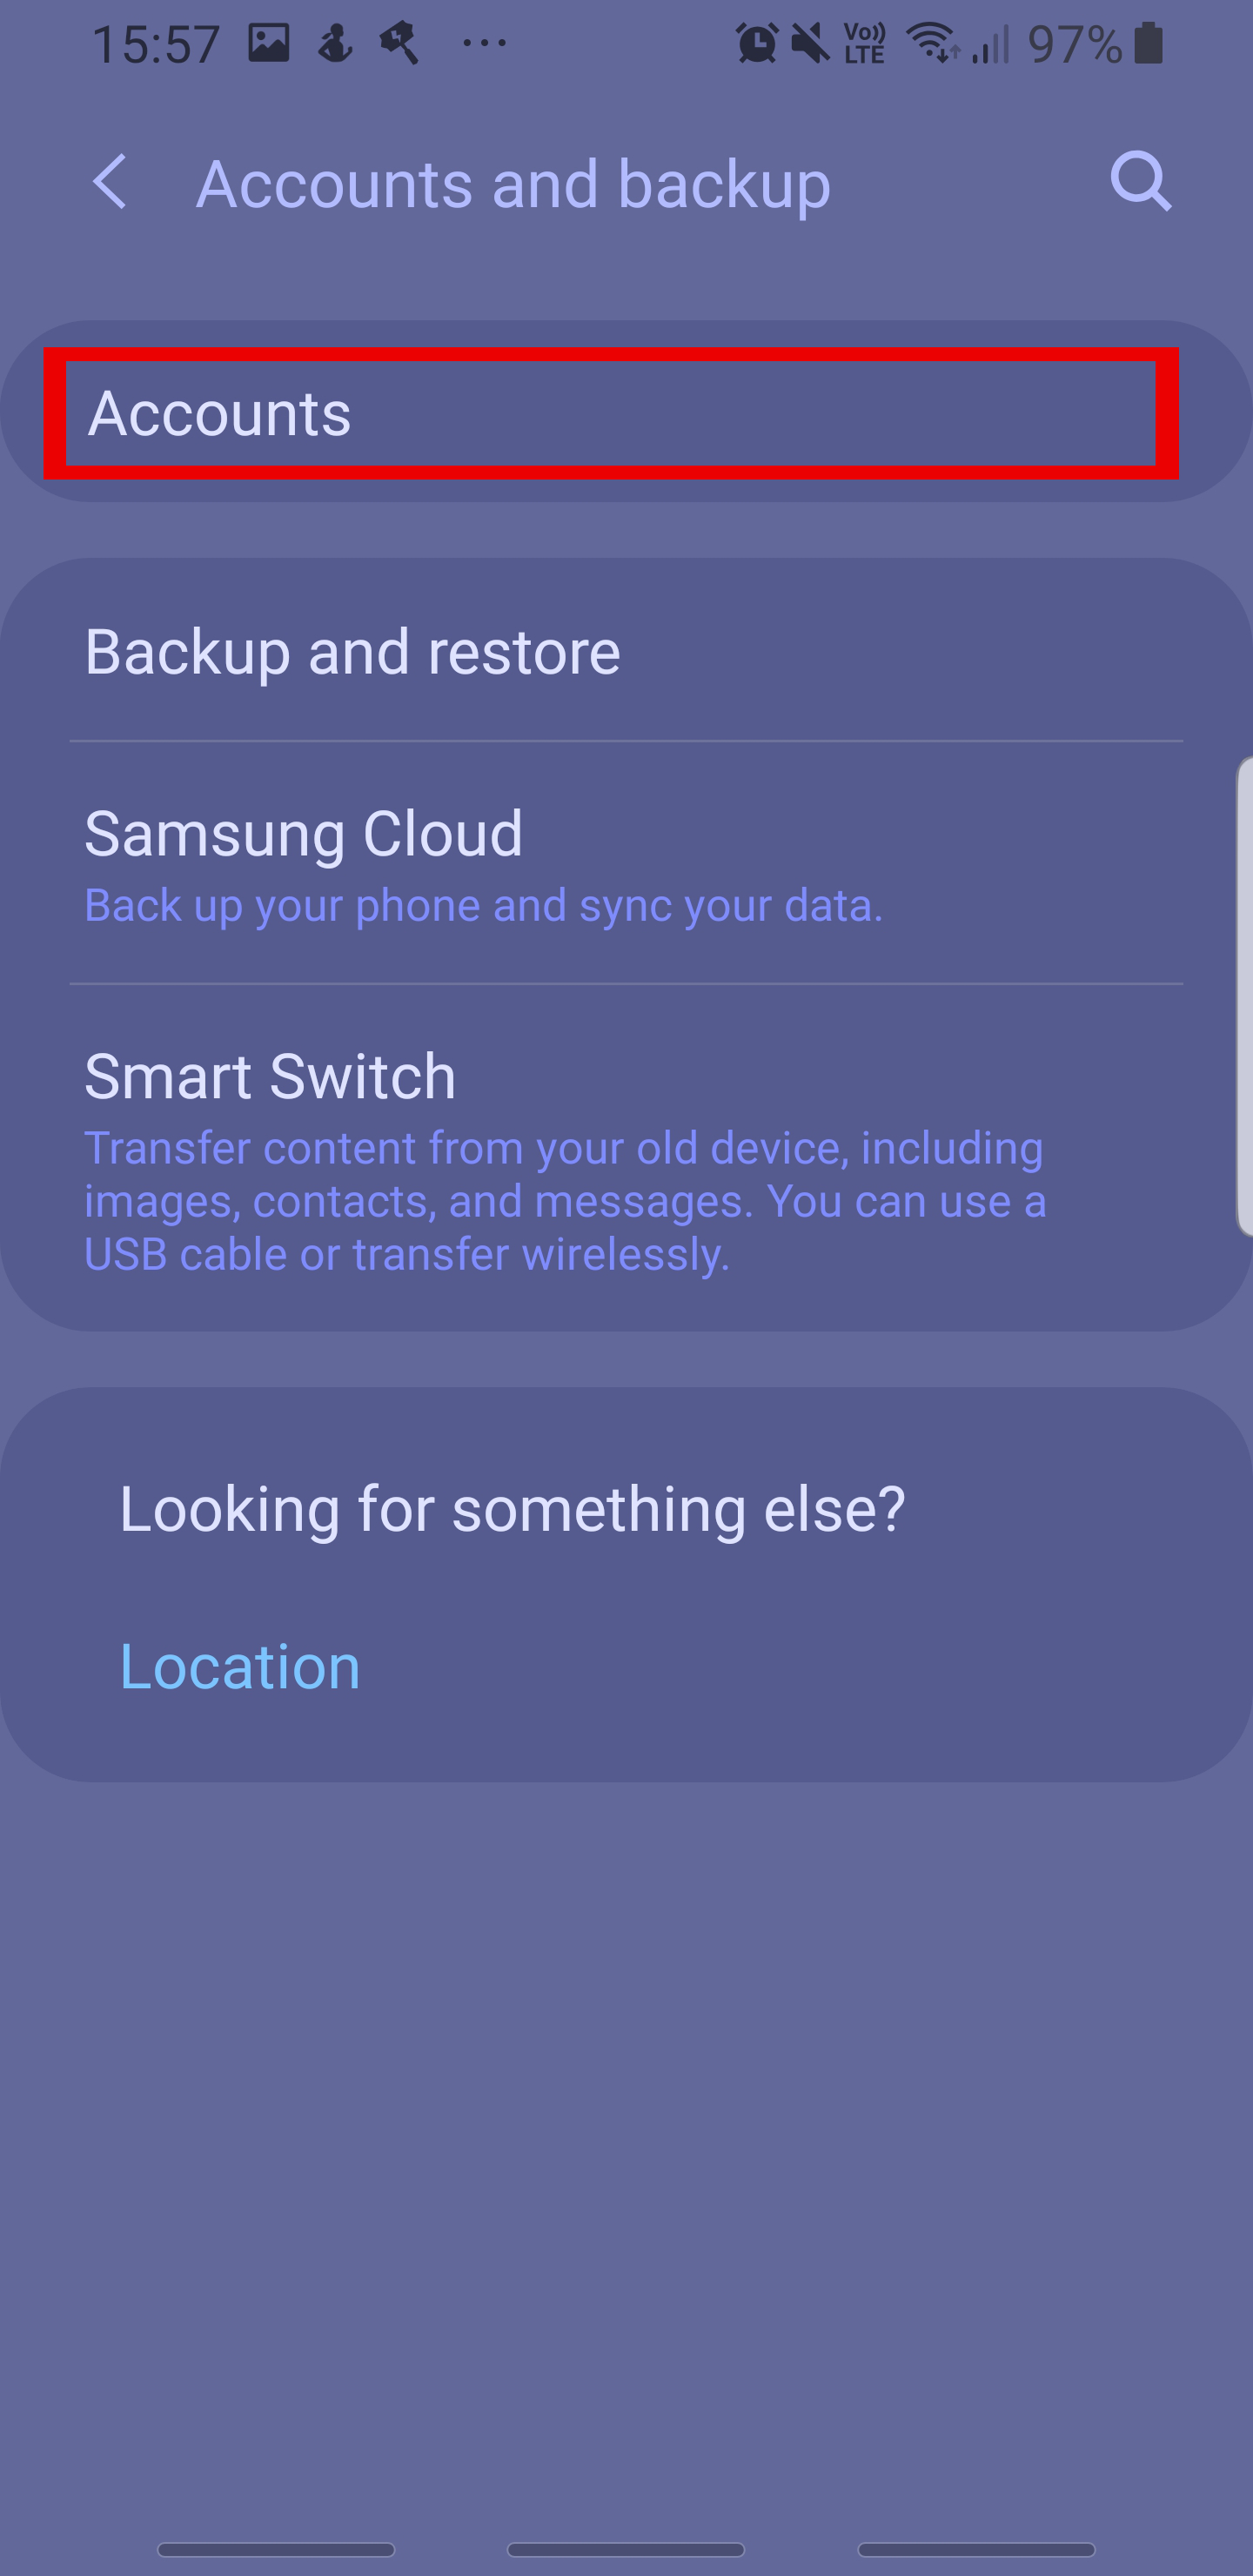
Step 3:
Select accounts.
Step 4:
Click Add Account.

Step 5:
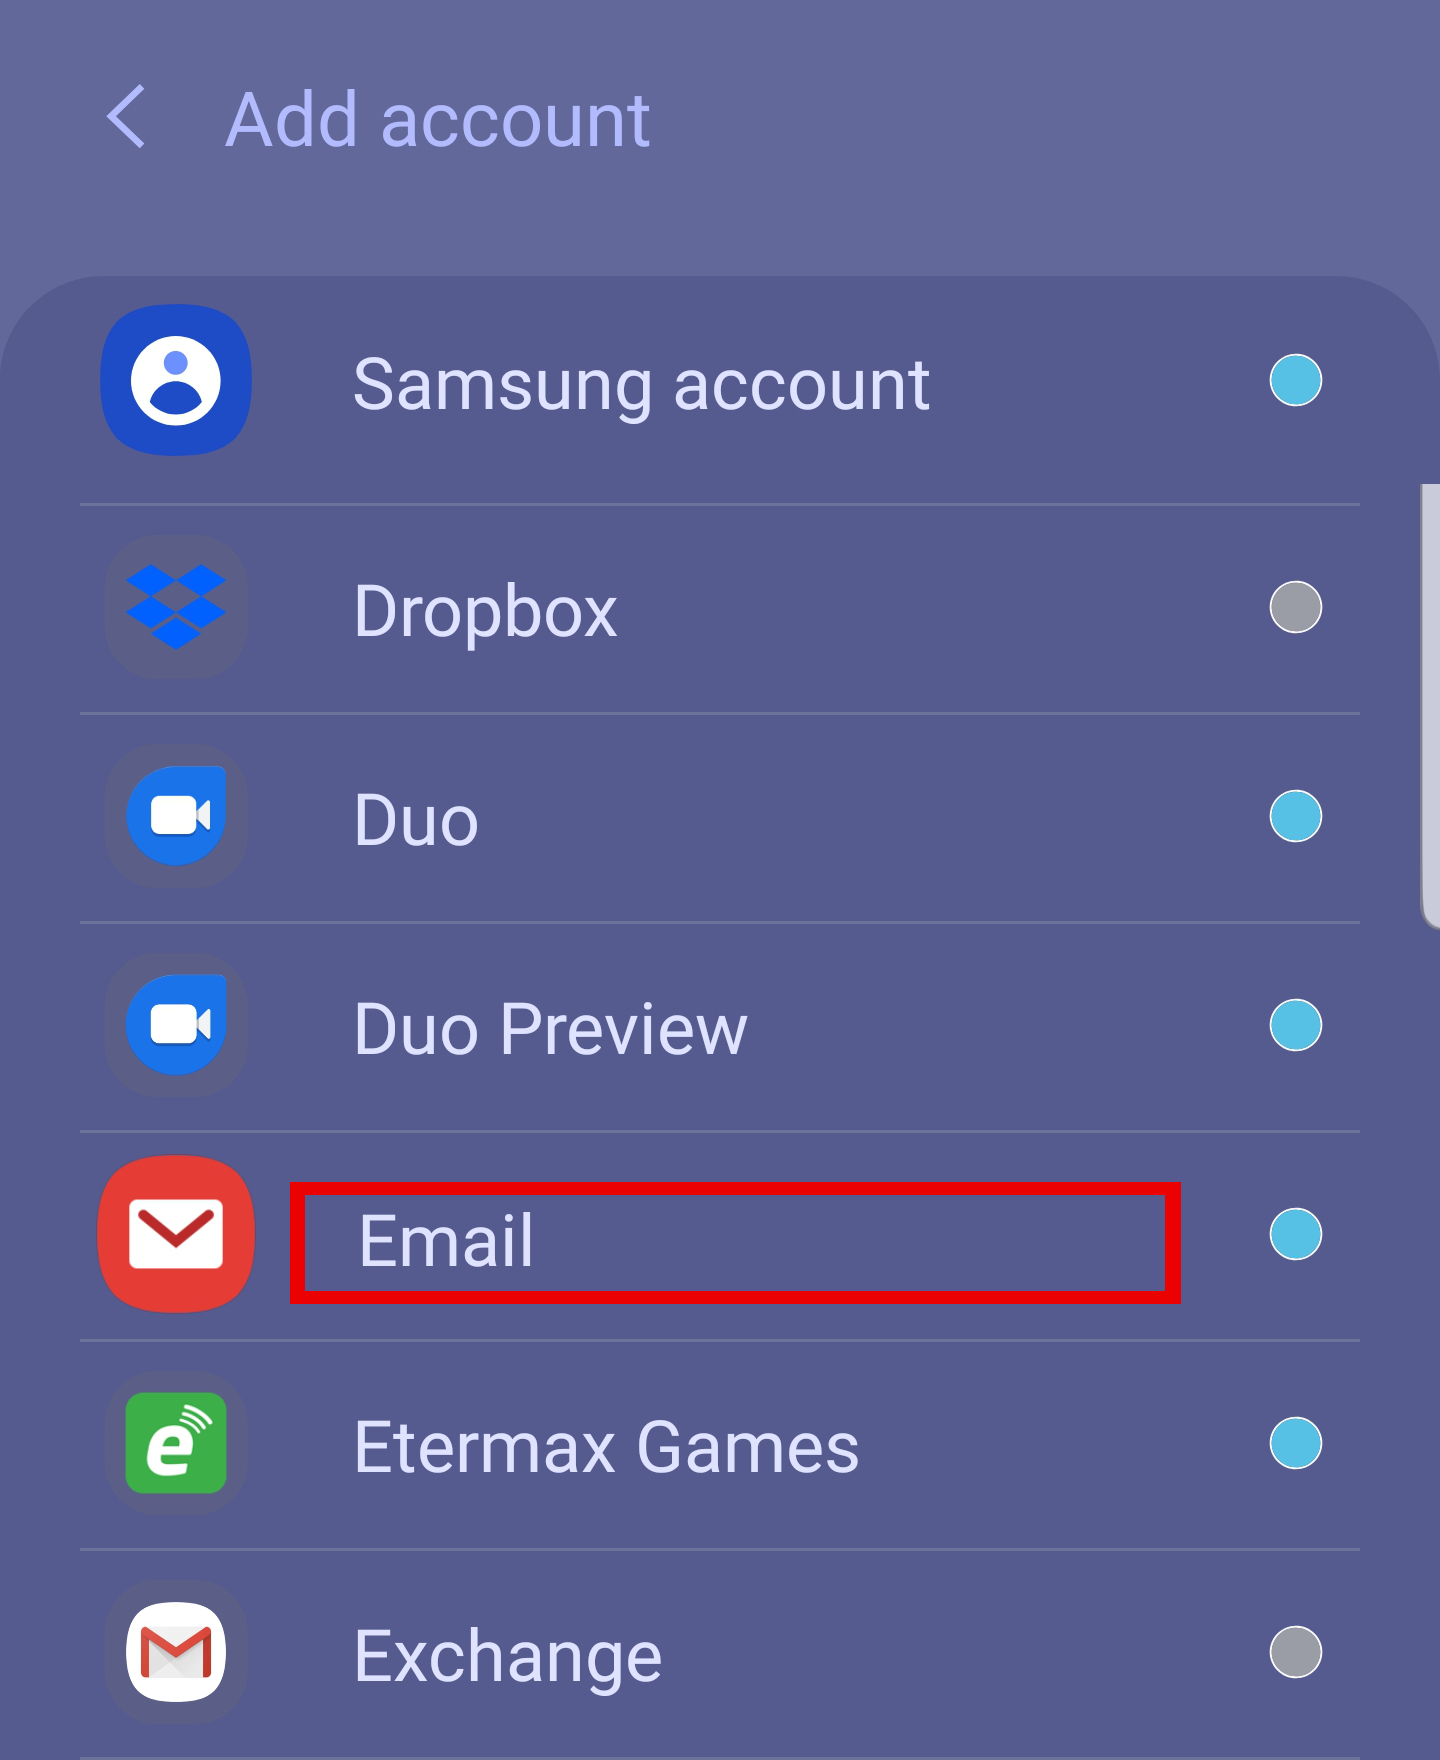
Select Email.
Step 6:
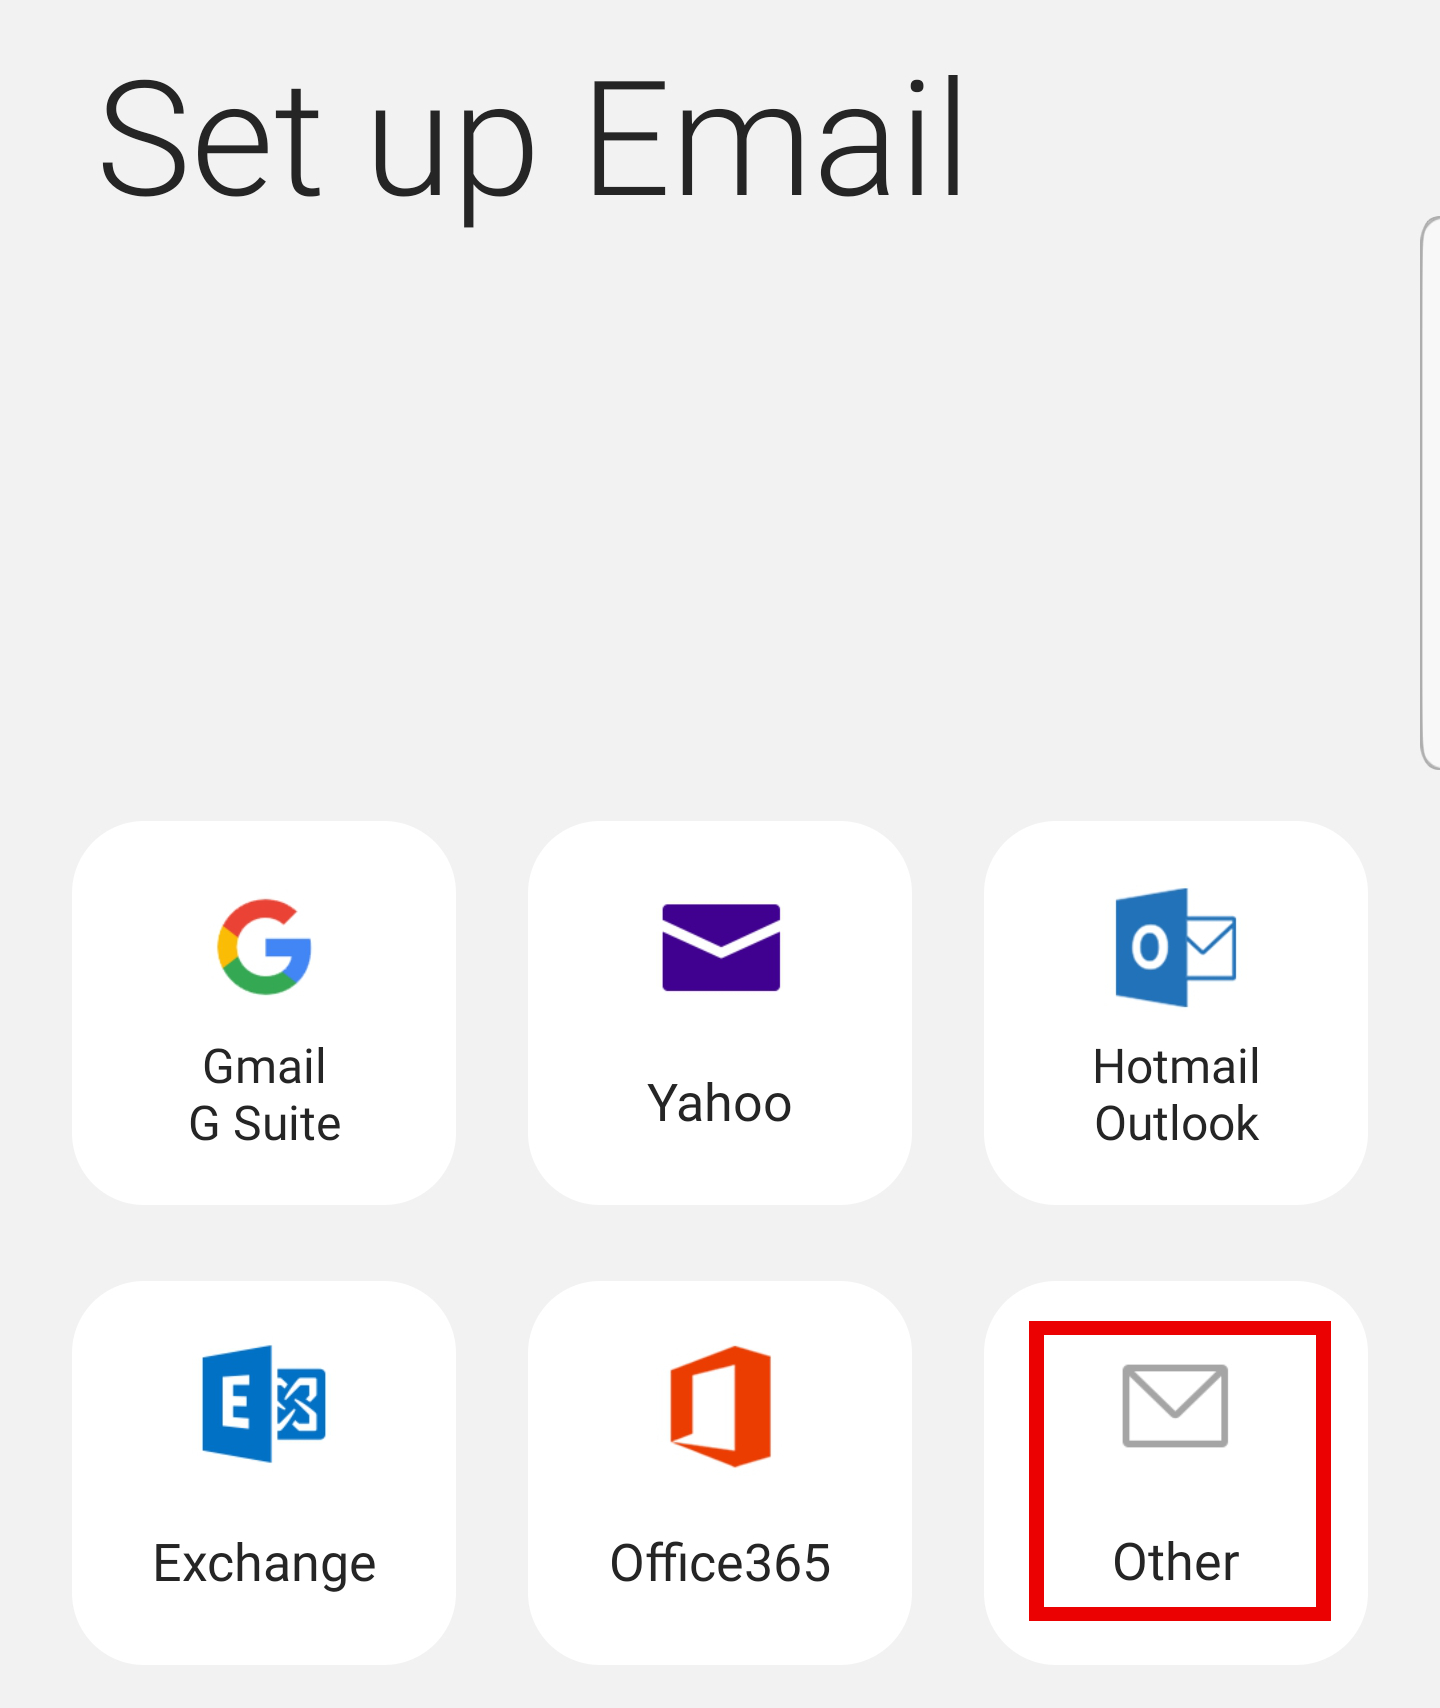
Click Other.
Step 7:
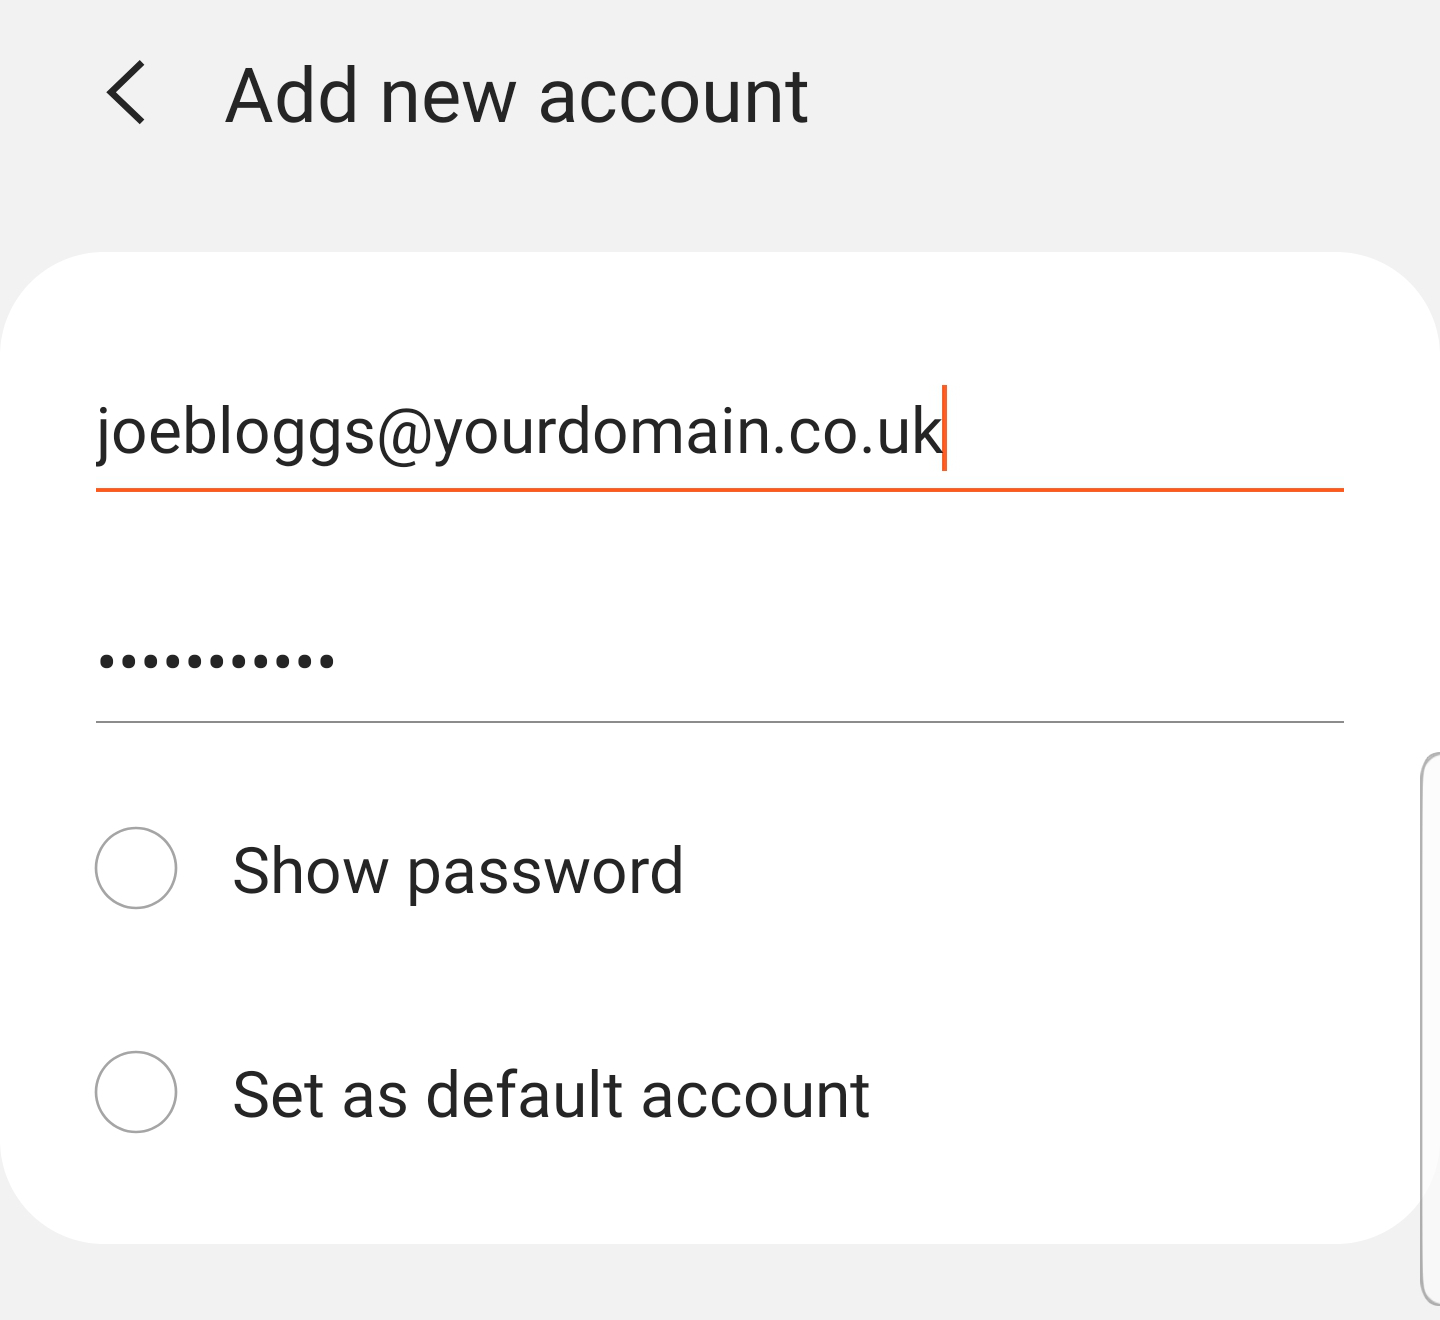
Enter your email account and Password we have sent you.
Step 8:
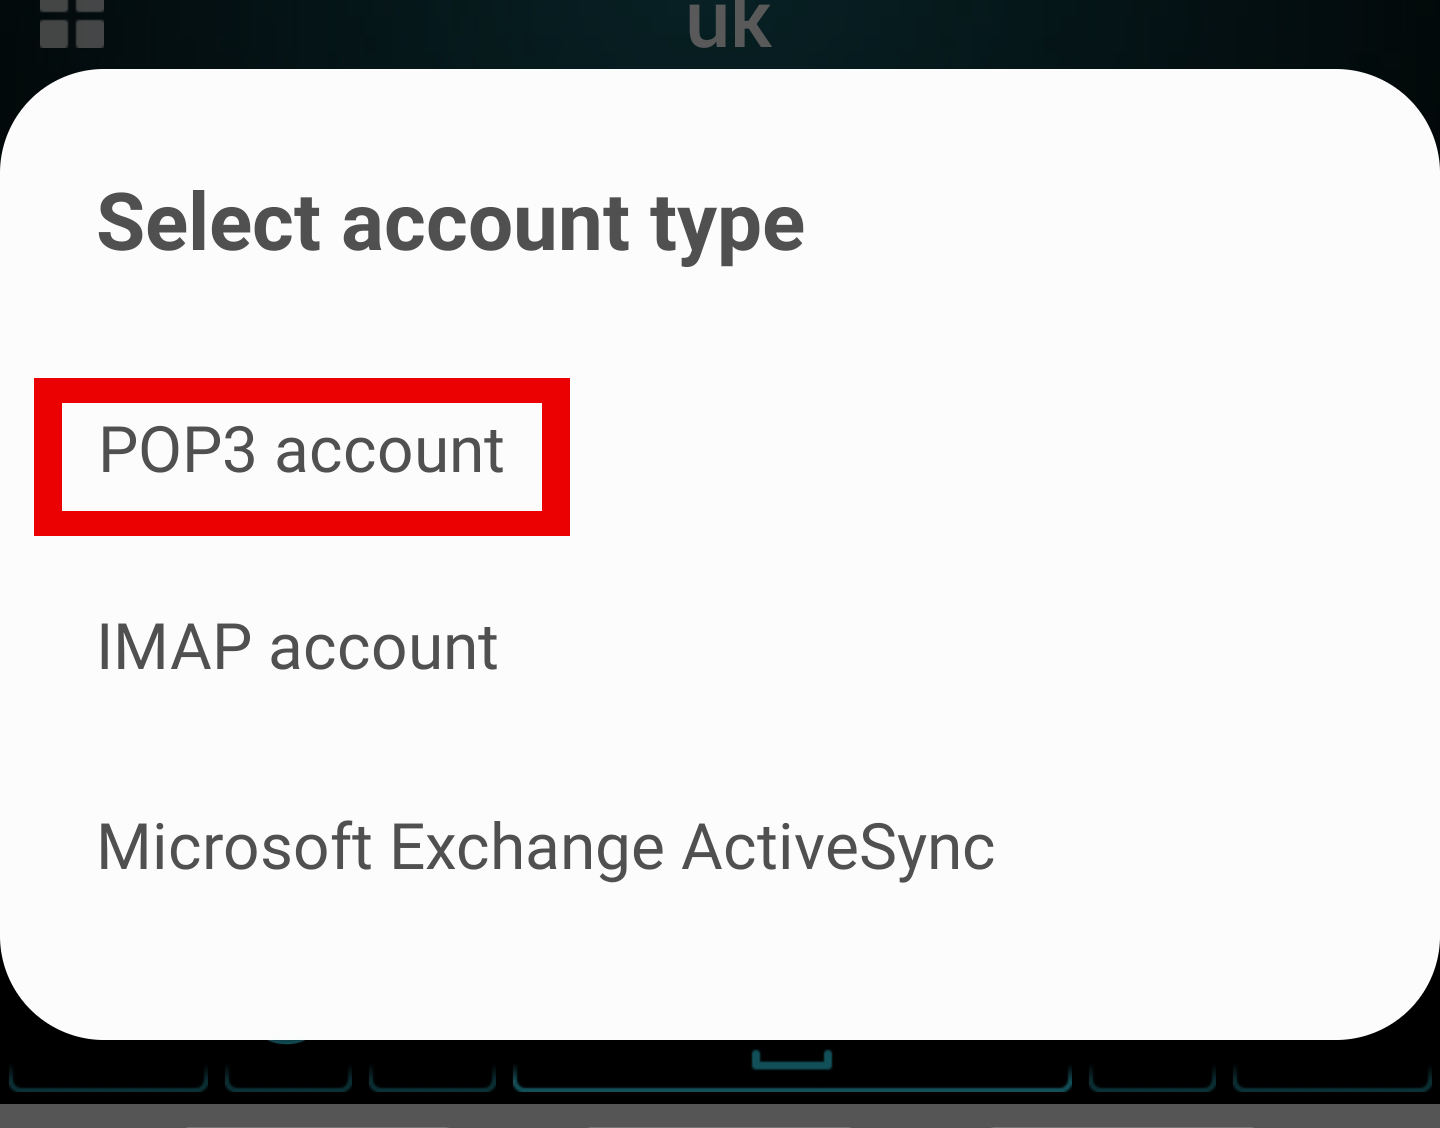
Select POP3 account as account type..
Step 9:
Fill in the following details:
Your full email address in the User name field.
Your email address password in the Password field.
In the POP3 Server field type in ‘mail.yourdomain.co.uk or server2.getyourmobi.co.uk’. (this will be provided to you with your login details).
Then type ‘110’ as the Port number.
In the ‘SMTP Server’ field type in ‘mail.yourdomain.co.uk or server2.getyourmobi.co.uk’. (this will be provided to you with your login details).
Then type ’25’ as the Port number.
Your full email address in the User name field.
Your email address password in the Password field.
Step 10:
Your Android device will now check your settings with the server.
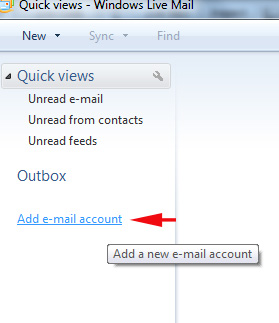
Setting Up Windows Live
Step 1:
First open Windows Live Mail, which can be found from your start menu.
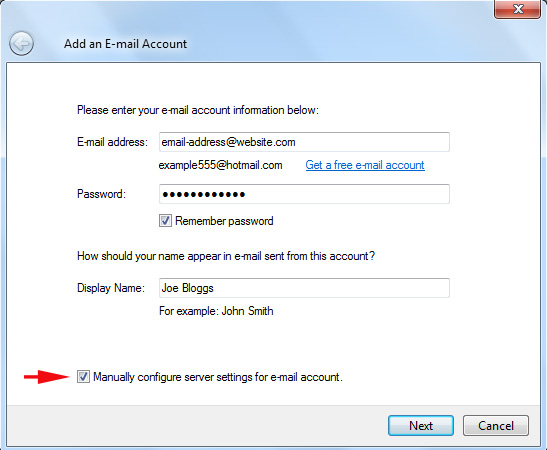
Step 2:
Once open, enter your email address, password and your full name. Please make sure the checkbox is checked for Manually configure server settings and click next.
Step 3:
You will now see the below menu, please enter the incoming and outgoing mail server as mail.yourwebsite.co.uk. Also put your login id the same as your email if this is currently different. Finally please make sure the checkbox is ticked for my outgoing server requires authentication. Once everything has been completed, please click next.
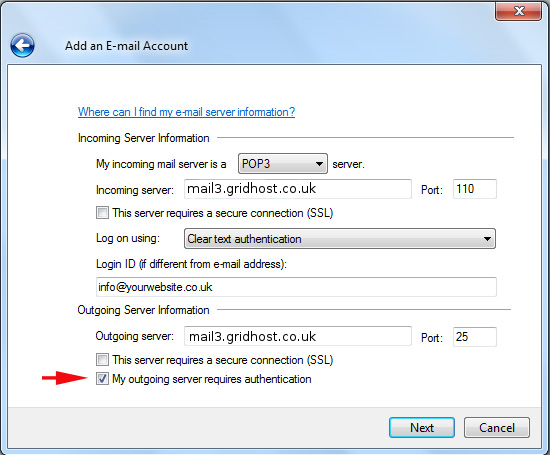
Your email account should now be ready to use.
Setting Up Gmail
Here’s how to enable POP in Gmail:
Sign in to Gmail.
Click the cog/gear in the top right.
Select Settings.
Click Forwarding and POP/IMAP.
Select Enable POP for all mail or Enable POP for mail that arrives from now on.
Choose what to do with your messages after your POP client or device receives them.
Click Save Changes.
Although the radio button next to your selected option may not stay selected, Gmail displays the status next to ‘POP Status:.’ When you enable POP, your settings display ‘POP Status: POP is enabled.’
If your POP settings are turned off, the status will indicate that POP is disabled.
Once you’ve enabled POP in your Gmail settings, you need to configure your client.
Unless you’re using recent mode to download mail to multiple clients, make sure you’ve opted not to leave messages on the server. Your POP settings in Gmail settings are what determines whether or not messages stay on the server, so this setting in your client won’t affect how Gmail handles your mail.
If your client does not support SMTP authentication, you won’t be able to send mail through your client using your Gmail address.
If you’re having trouble sending mail but you’ve confirmed that encryption is active for SMTP in your mail client, try to configure your SMTP server on a different port (465 or 587).
Setting Up Outlook
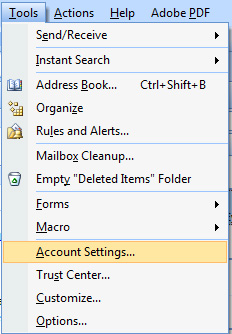
Step 1
First open your Microsoft outlook program and go to Tools >Account Settings
Step 2
This will open a window with multiple options. Please go to New

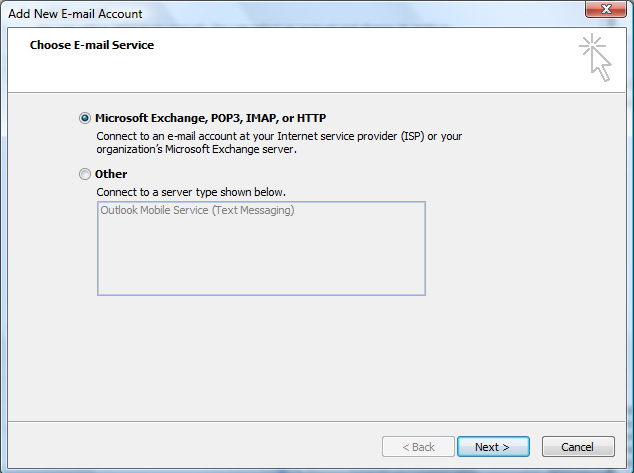
Step 3
Once opened please select Microsoft Exchange, POP3, IMAP, or HTTP and press Next.
Step 4
On the next screen please select Manually configure server settings or additional server types.

Step 5
Then select Internet E-mail from the options

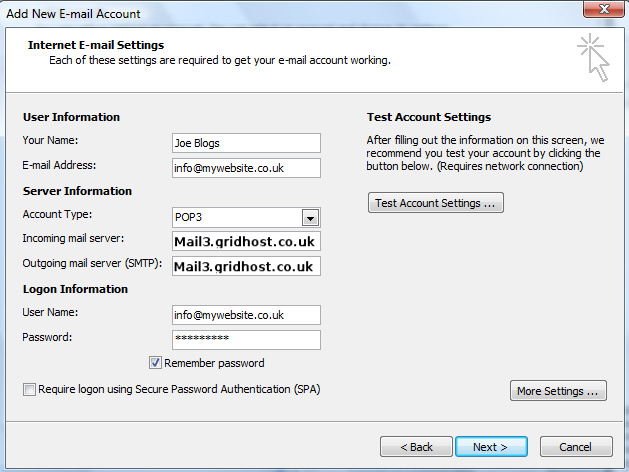
Step 6
This will open a window like below. Please fill out the below but change your setting to suit your website.
E.g. Change mywebsite.co.uk to your website address. Also please change the user name and password to the ones provided by your web designer.
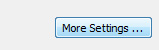
Step 7
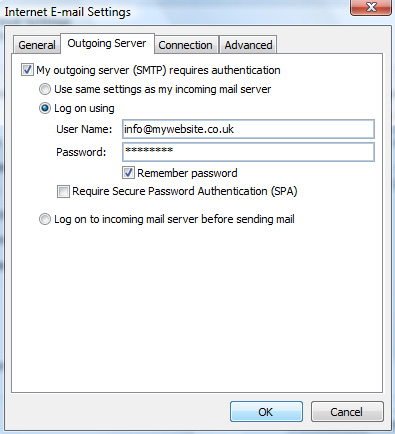
After you have filled in the details above, press the More Setting tab.
Step 8
Then the Outgoing Server tab and click Log on using and enter your username / password.